Run npm install kendo-ui-core aurelia-kendoui-bridge --save in the console
Step 3.
Add the following import to main.js: import "kendo-ui-core";
Step 4.
Add the following to webpack.config.babel.js following to aurelia bundles
Step 5.
Add the following to webpack.config.babel.js file to generateConfig entry property
Step 6.
Add this autocomplete.js file to the project
Step 7.
Add this autocomplete.html file to the project (note that kendo specific stylesheets are defined in index.html)
Step 8.
Add this autocomplete.css file to the project
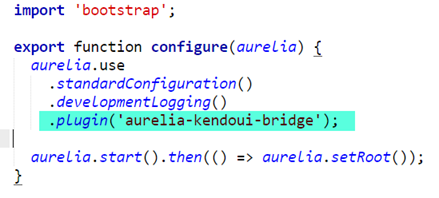
Step 9.
Add the request to load the aurelia-kendoui-bridge plugin by adding the highlighted statement below (.plugin('aurelia-kendoui-bridge'); to the file main.js